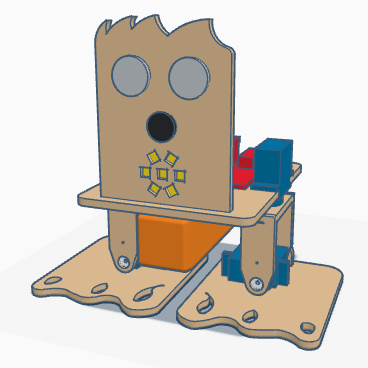
[:es]En esta entrada explicamos el procedimiento de ajuste del robot DYOR bPED.
El montaje del robot DYOR bPED puede estar desajustado con respecto de la configuración de inicio. Si el desajuste no es demasiado grande, se puede utilizar un procedimiento de calibración/ajuste del robot de forma que por programa podamos hacer que el robot camine adecuadamente.
Materiales
Para este ejemplo, necesitaremos el robot DYOR bPED (cualquier de sus variantes valdrán). En este ejemplo, hemos conectado los servos de la siguiente manera:
- Pierna 1 (Derecha): Pin D4.
- Pierna 2 (Izquierda): Pin D5.
- Tobillo 1 (Derecho): Pin D6.
- Tobillo 2 (Izquierdo): Pin D7.
Facilino
A continuación se muestra el código de Facilino que se necesita para calibrar el robot.
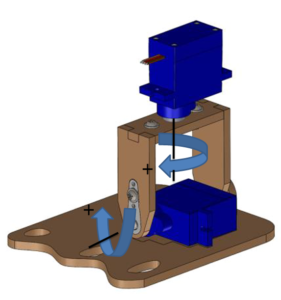
Una vez programado el robot, debería quedase en la configuración mostrada anteriormente. A continuación se muestra el sentido de giro positivo de cada uno de los ejes. La pierna derecha gira hacia fuera con valores positivos, mientras que la pierna izquierda gira hacia dentro. Por otro lado, el pie derecho apoya la parte interior con valores positivos, mientras que el pie izquierdo apoya la parte exterior.
Observando la situación del robot cuando se configura la posición de inicio, debemos averiguar el ángulo de desajuste de cada servo, de forma que utilizaremos el valor contrario. Es decir, si la pierna derecha apuntase hacia afuera, entonces debemos introducir un valor negativo que ajuste su posición hasta que esté recta. Repetir este procedimiento con cada uno de los servos hasta que logréis tenerlos bien posicionados.
¿Qué sucede si mis valores de calibración son elevados?
Lo más conveniente, en este caso, es demontar el robot y asegurarse que los servos están posicionamos en 90º (configuración de inicio) cuando los montamos. Si atornillamos las manillas de los servos cuando están alimentados estos están continuamente realizando un control de posición y por tanto ofrecen un par a cualquier movimiento que trate de desplazarlo de esa posición. Esto evitará que se gire el eje del servo en el montaje.[:en]In this post, we explain the calibration procedure for DYOR bPED robot.
Assembly of DYOR bPED robot might be misaligned with respect to the home configuration. If the misalignment is not too much, we can use the following calibration procedure so that we can adjust the correct angles by software.
Materials
In this example, we will use DYOR bPED robot (any variant will use the same procedure). In this example, the servos are connected as follows:
- Leg 1 (Right): Pin D4.
- Leg 2 (Left): Pin D5.
- Ankle 1 (Right): Pin D6.
- Ankle 2 (Left): Pin D7.
Facilino
Here we show Facilino’s code to calibrate the robot.
Once the program is uploaded, the robot should be in the home configuration as previously shown. Here we show axis directions (with a «+» sign indicating a positive angle). Legs rotate with a positive angle clockwise (seen from above), while a positive angle rotation on the left foot makes the interior part of the sole to be in contact with the ground and a positive angle rotation on the right foot makes the exterior part of the sole to be in contact with the ground.
By observing the robot misalignment, we can figure out the correct angle value to adjust, so we need to introduce the opposite value to compensate the misalignment. For instance, if the right leg is rotated clockwise some degrees, we will need to compensate that with a negative value. Repeat this procedure until you have the robot properly calibrated.
What if the calibration values are too high?
In this case, it is convenient to disassemble the robot and make sure that this time the servos are properly positioned at 90º (home configuration). To make sure that the axis does not rotate while we are screwing the servo horns, we can power them, so they will have a torque against being displaced.[:]