The purpose of this entry is to provide a guide for publishing contents in DYOR’s Blog at https://dyor.webs.upv.es
About the Blog site
DYOR’s Blog site has been created to include contents related to DYOR robot and as a consequence, all contents must be related to these topics.
You can create entries related to new robot’s designs, examples or how-tos, demonstrative videos, classroom-related activities (with DYOR or Facilino), etc… This will help other users to understand how to solve a particular problem in the same way other entries have been useful for you, so please do the best you can!
We’re pretty sure that many people will be pleased with contents, so please provide as much information as you want. It’s up to you to decide what you want to publish, for instance, you can include designs, videos, code, etc… as long as it may help other people to succeed with DYOR.
WordPress
WordPress is a contents management system widely used and is the basis of this Blog site.
How to publish
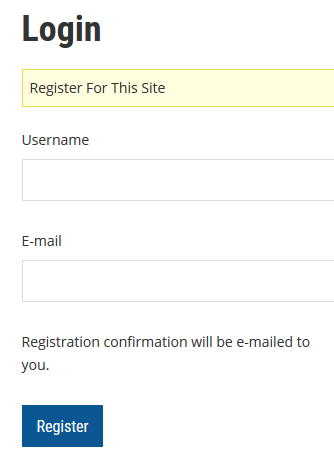
First, we need to register on the blog site.
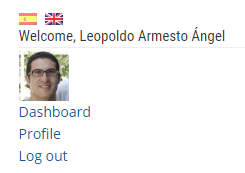
Once registered, we need to start the session to be able to publish contents. After, log in, we should see your public data, as well as links to get access to to your profile and close the session.
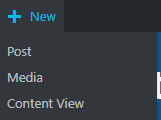
To create an entry, access to the WordPress bar at the top of your page and select ‘Post’.
Here we highlight the main aspects of an entry:
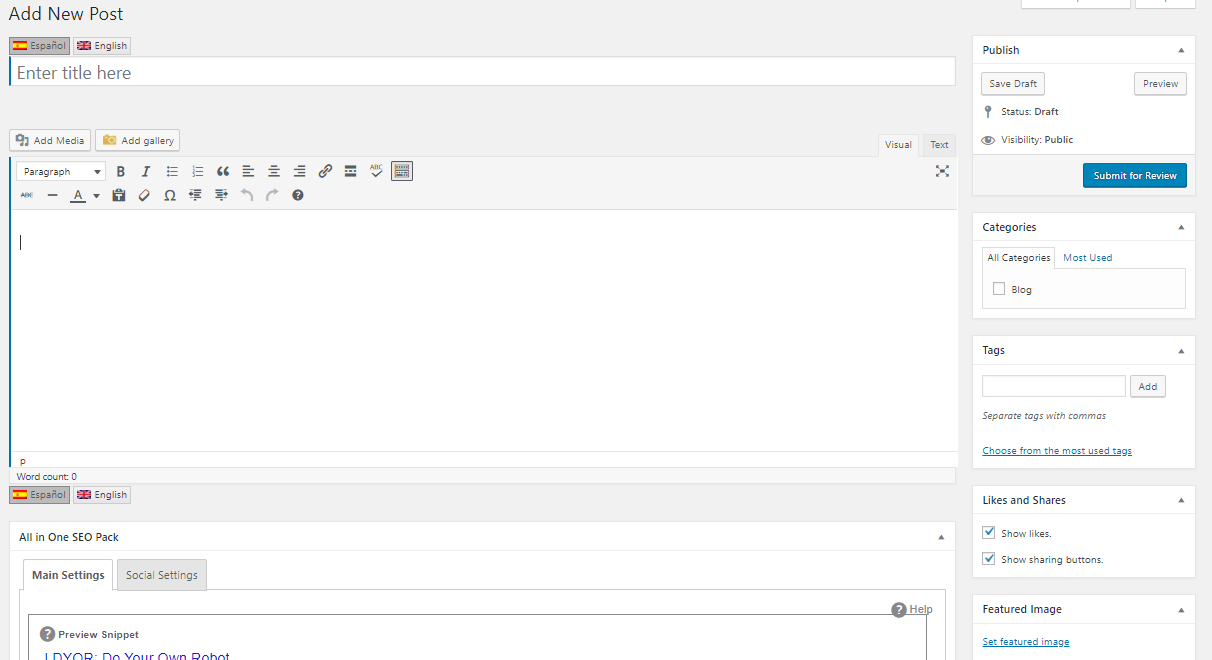
- Language: We must first select the language of the entry. Only Spanish and English are allowed.
- Title: Title must be informative and appealing. Maximum recommended: 10 words.
- Contents: In the contents, we must include all data we want to show. Read recommendations about structuring your text in sections and add links, images, videos, etc.
- Format: We can format our text with standard WordPress tools.
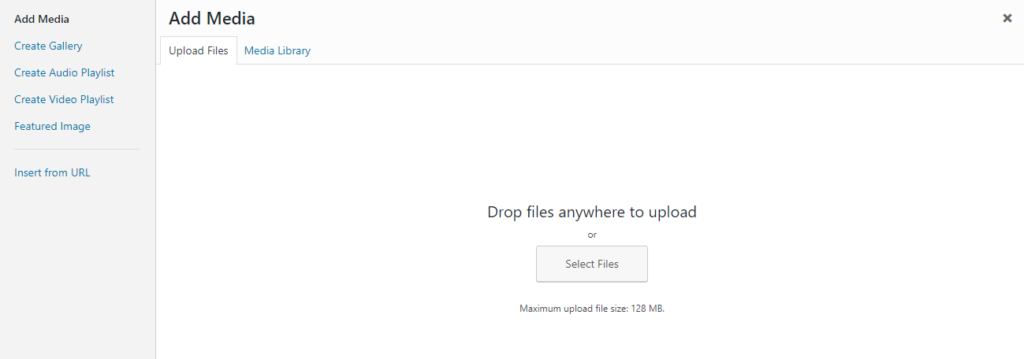
- Images and Videos: We can add an object to include images and videos. Images can be directly uploaded to the WordPress library, while for videos, we recommend to upload them to Youtube and here we simply introduce the video URL. For images, click on “Add Media”, go to “Upload Files” and then click on “Select Files” to upload a file. For videos, click on the left side option “Insert from URL” and then introduce the URL of the video.
- Read more: Every entry must contain a summary of the entry at the beginning, before the actual contents of the entry. To separate this summary from the rest of the contents, we need to add the “Read more” tag (inside the text formatting toolbar of WordPress). Maximum recommended: two text lines.
Categories
Categories are used to classify the type of entries. All your entries will be categorized as “Blog”. Additional categories can be requested to soporte@roboticafacil.es
Featured Image
Post image is used to represent graphically your entry. In must be square, about 300x300px.
Save and Publish
We must save our changes before submitting them (actually we should save them regularly).
The first time we save the entry, WordPress will assign a URL to your entry. This is also known as “permanent link”. This link can be modified to something more appropriate, but once modified it is not recommended to change it again.
To publish your entry, you have to submit it first for review by clicking on “Submit for review” and wait until get’s published. We will review submitted entries weekly, but if it takes longer, you can contact soporte@roboticafacil.es
If you can create the entry, but it is not still published will be shown as a draft. You can manage your entry on WordPress in the left side menu inside your WordPress Desktop.

Buttons
We can easily add buttons to show other users that they can download a ZIP file.
We use Easy Media Download WordPress plugin that allows you to add a “shortcode” to create the button. It is easy and it’s documented in the plugin itself. Anyway, here we show an example.
[easy_media_download url="http://url_contents.zip" text="Button text" width="250" force_dl="1" color="orange_two"]
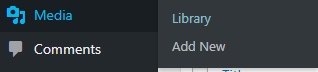
To upload a file, we simply need to access to “Media” menu on the left-side of WordPress Desktop and click on “Add New”.
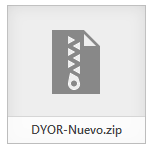
Only ZIP files are allowed.
Once uploaded, it will be included in the Media Library with an icon of a ZIP file and the name of the file.
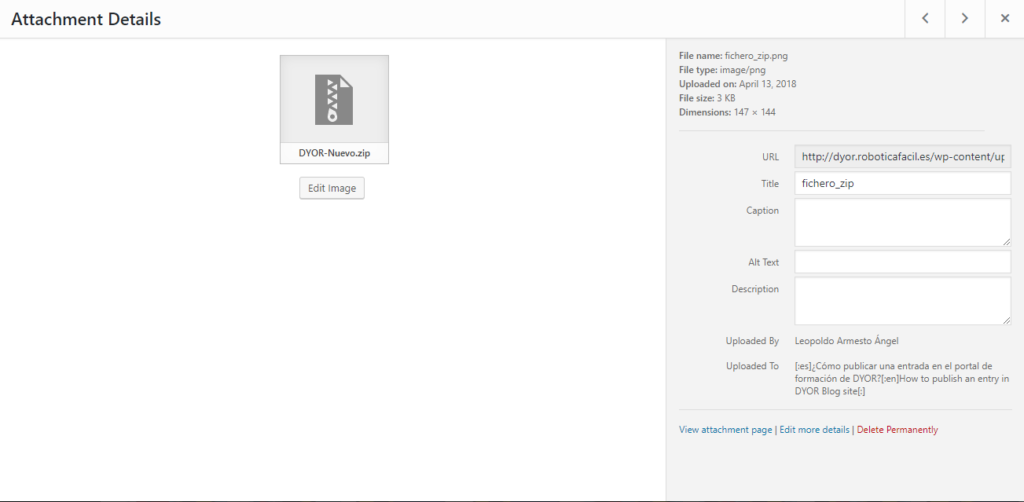
To get the correct URL of the file, click on it and get it from the attachment details.
General Settings
Below the contents of the entry, there’s a section with “General Settings”. This will improve the visibility of your entry with SEO (Search Engine Optimization) for Search Engines such as Google, Yahoo, Bing, among others. Add a title, a summary and some keywords. You can simply copy paste the title of your entry, and the summary you did for the “Read more” section. Keywords depend on your contents, but here you can find some useful ones “robot, DYOR, Arduino, robot, robotics, etc…” (The more specific the better).
Video
Here you can find a video explaining how to publish: