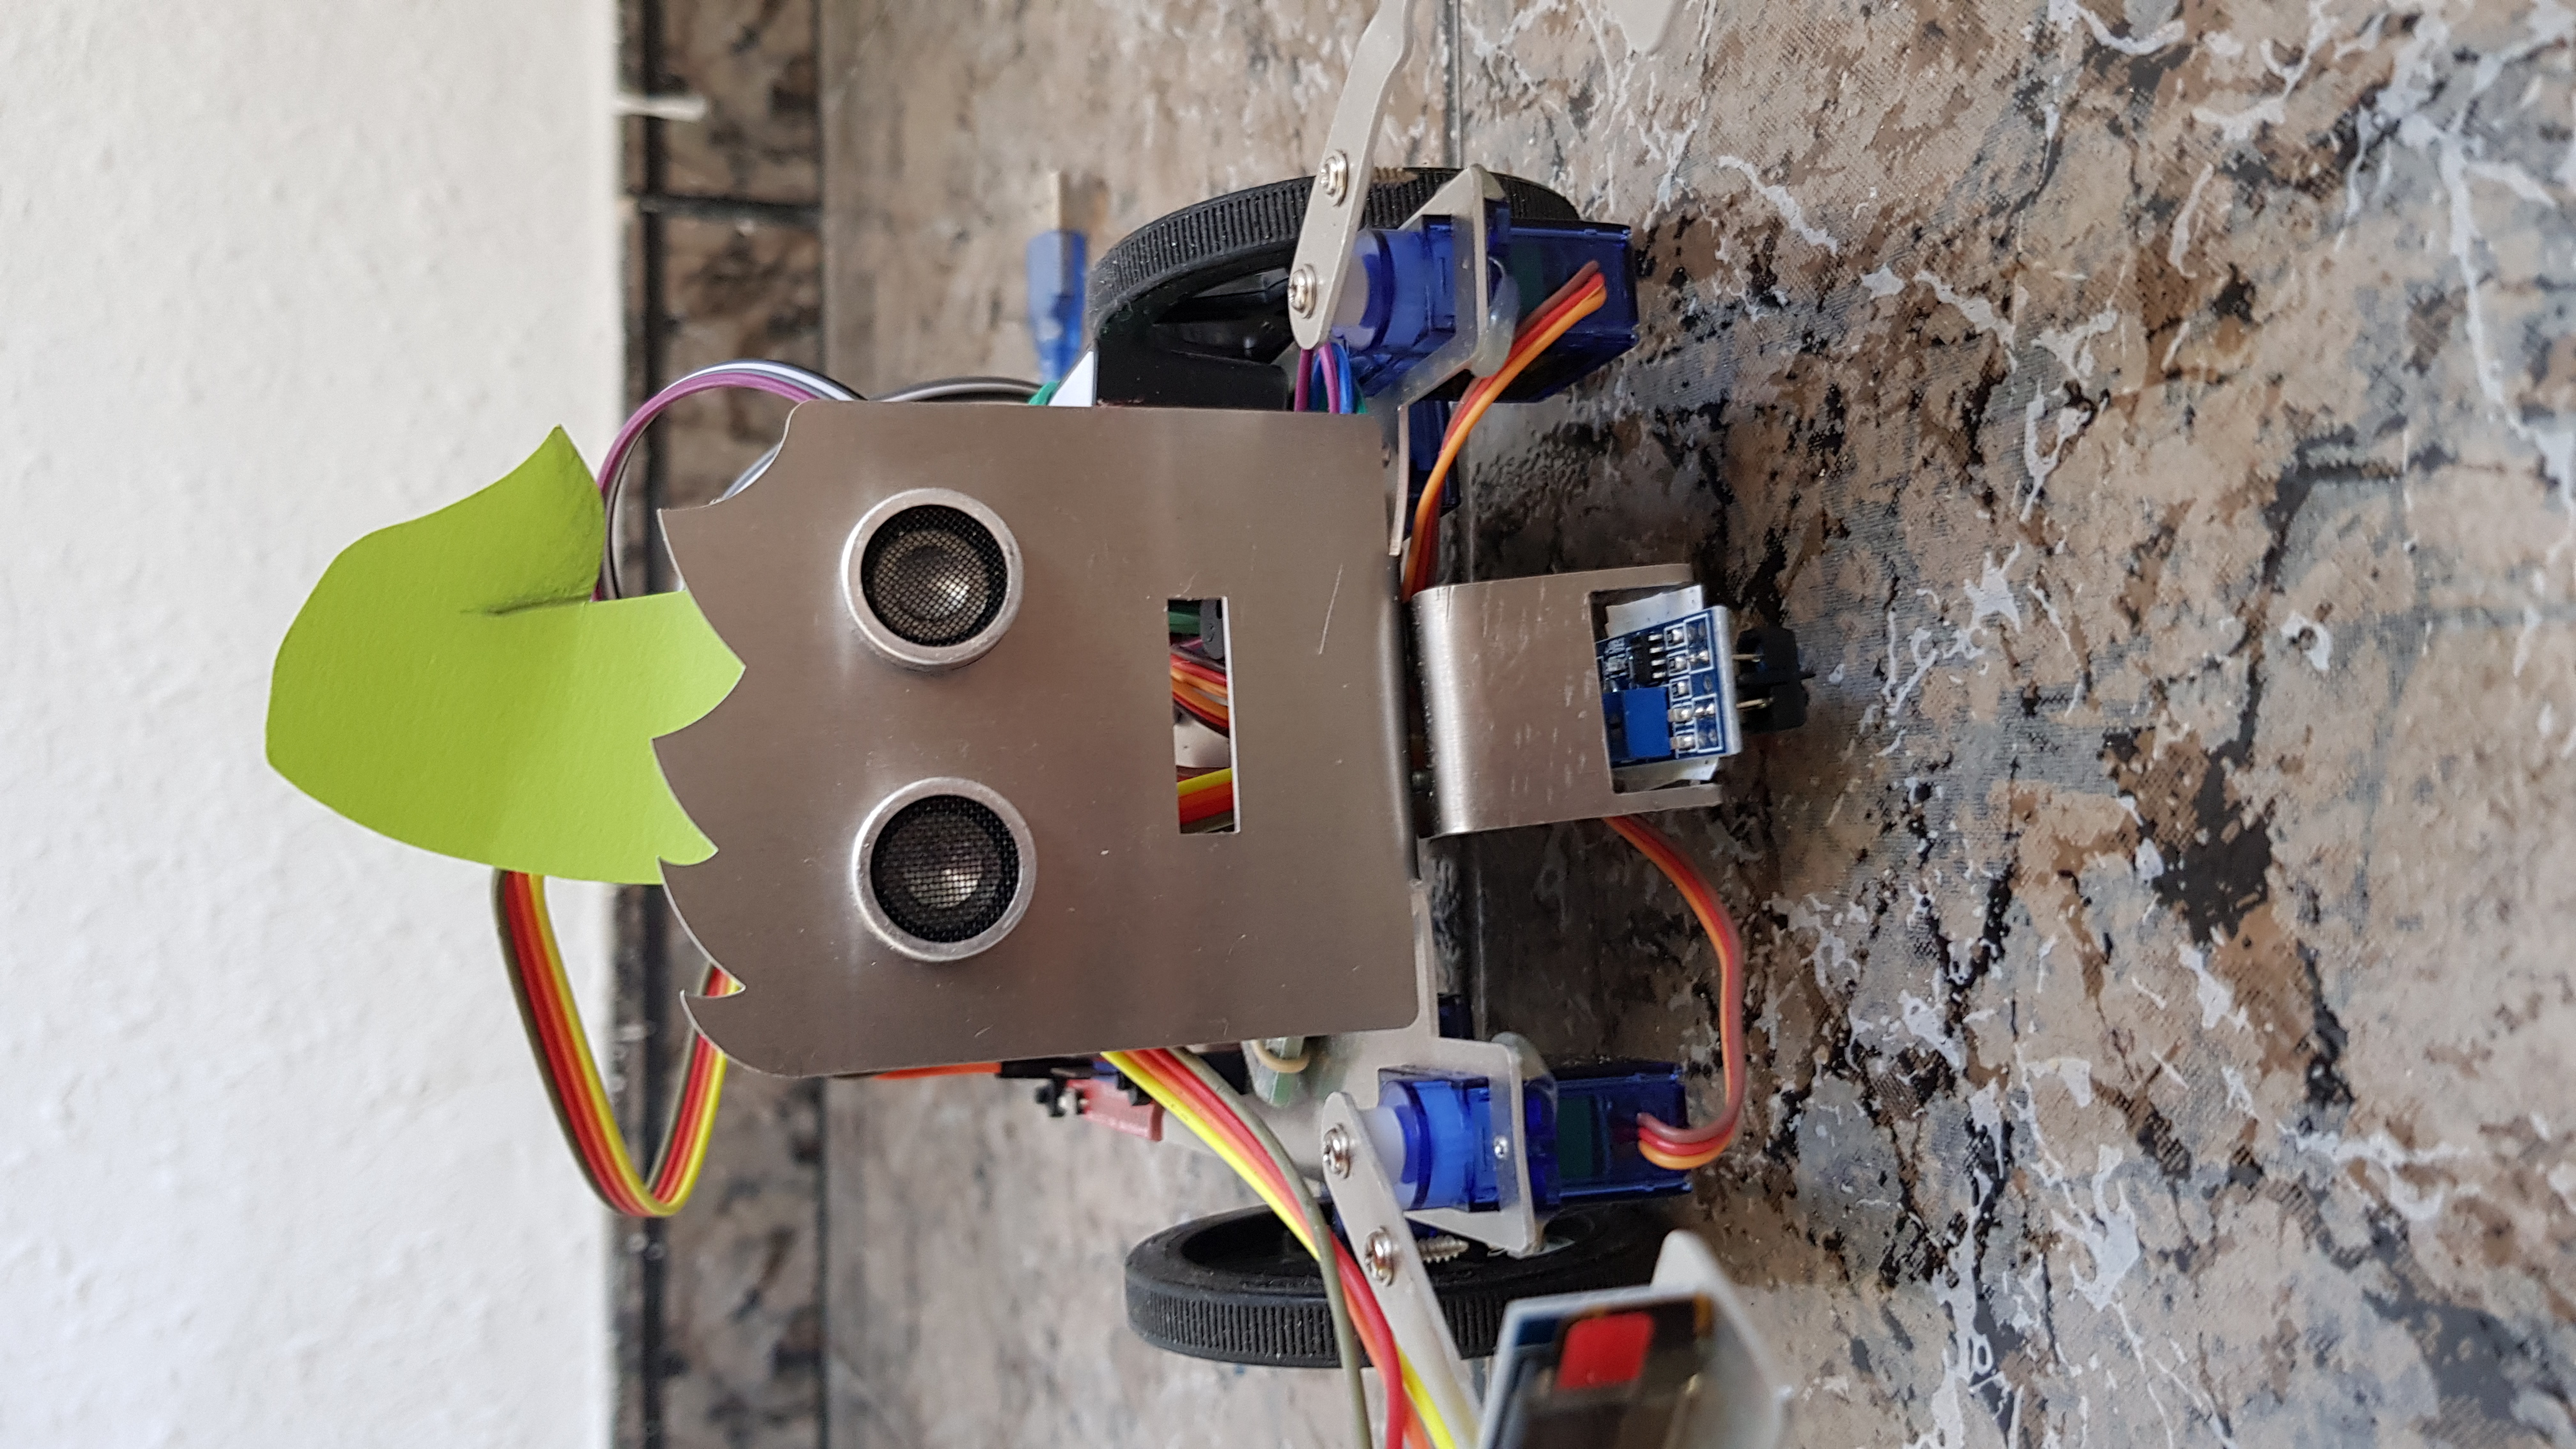
[:en]In this entry I will present my robot from the Mobile Robotics class at UPV based on the DYOR Robot Concept. My main theme is the video game «The Legend of Zelda».
Design
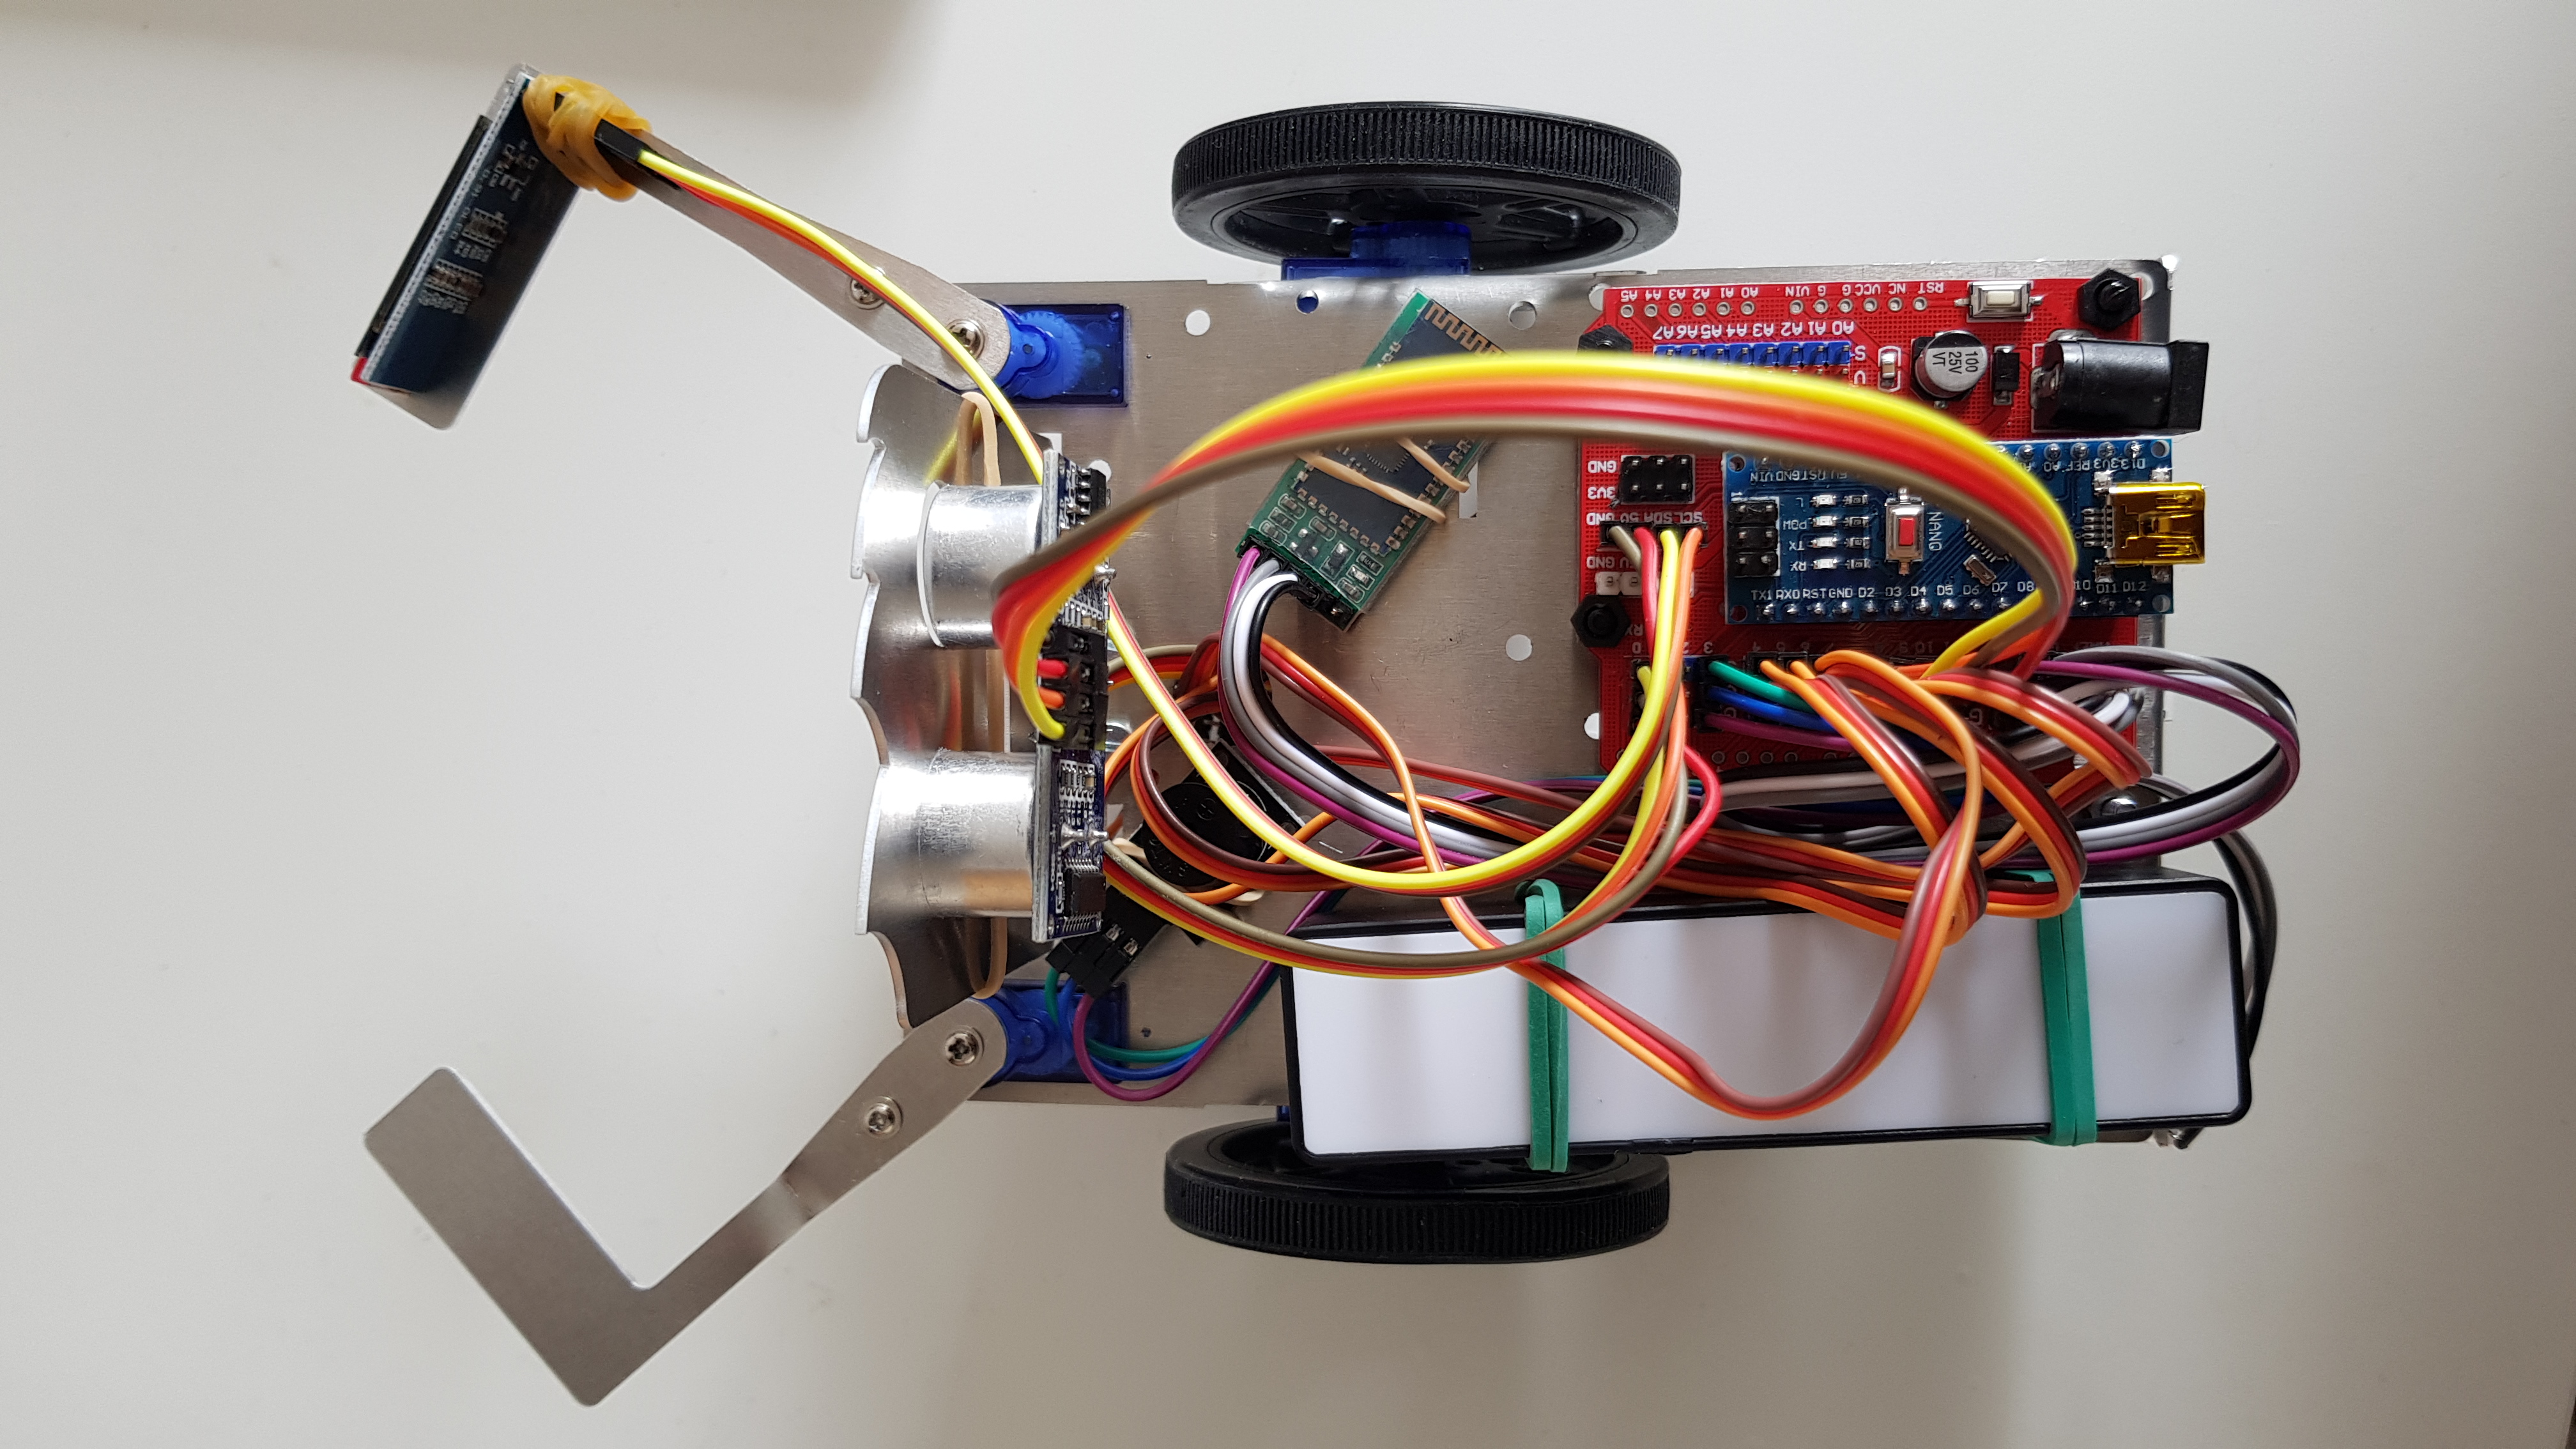
For our robot projects it was unfortunately not possible to choose other robot-face designs or specific arm designs due to manufacturing issues. Therefore, I used the default face and and vertical arm movement to allow my robot the gripping and pushing of objects.
Components
The used components are listed below:
- Arduino Nano + Exension Shield Arduino Nano I/O
- Powerbank 3600mAh
- Ultrasoundsensor HC-SR04
- Buzzer KY-006
- 2 x Servos SG90 (arms)
- 2 x Servos FS90R (wheels)
- Bluetooth
- Line Tracker TCRT5000
- OLED Display
- Caster Wheel
- Screws
Main Attributes
For his Adventures, RoboLink is prepared with the following main attributes
- Speed Regulation
- Direction Control with the Arrows
- Direction Control with the Accelerometer
- Line Tracking
- Singing (sound production depending on the distance the ultrasound measures)
- Opening and closing the arms
- Stop when object is too close
- Produces a Zelda-Sound with the Buzzer
- Greats the user with sound and arm movement when he tells him «Hello Link!» and says goodbye with «Goodbye Link!»
The Program
Setup
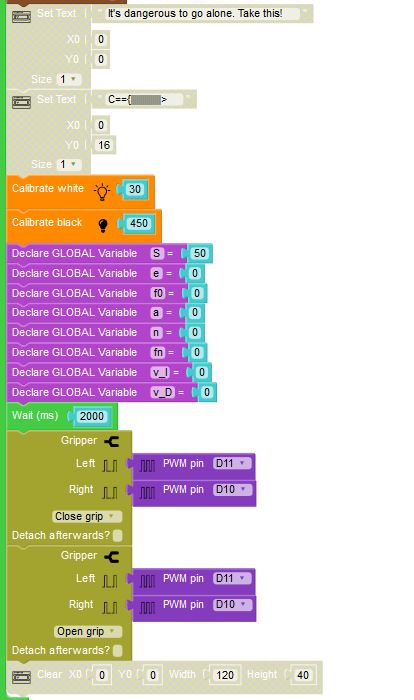
For the beginning, I implemented the Bluetooth such that my robot has a fixed name. Following that, the actual program begins.
RoboLink starts with showing four hearts and a text on the OLED-Display and a music snippet from The Legend of Zelda is playing. I inserted the Hearts with the Set 8×8 Image piece and used the 8×8 Triangle as a place holder. In the actual code I changed the triangles for the full hearts like this:
0x00, 0x36, 0x5F, 0x5F, 0x3E, 0x1C, 0x08, 0x00
and for the half full hearts like this:
0x00, 0x36, 0x59, 0x51, 0x32, 0x14, 0x08, 0x00
For the infrared LineTracker, the calibration of the black and white value must be done. Furthermore, some variables are declared to later be able to use them in the code. After RoboLink waved one time, the Loop starts.
For unknown reasons it was not possible to both have the OLED Display and a functioning Bluetooth connection running. Therefore, the blocks related to the OLED output are blurred in the image below.

Loop
In the Loop firstly I implemented a collision detection to make sure that RoboLink’s adventures don’t stop because of running against walls. If a collision is detected, the Robot stops.
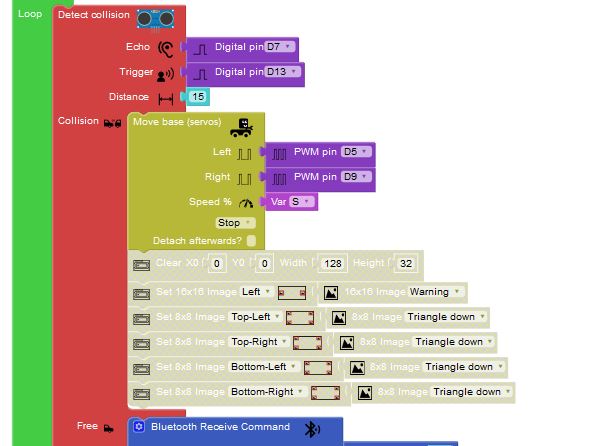
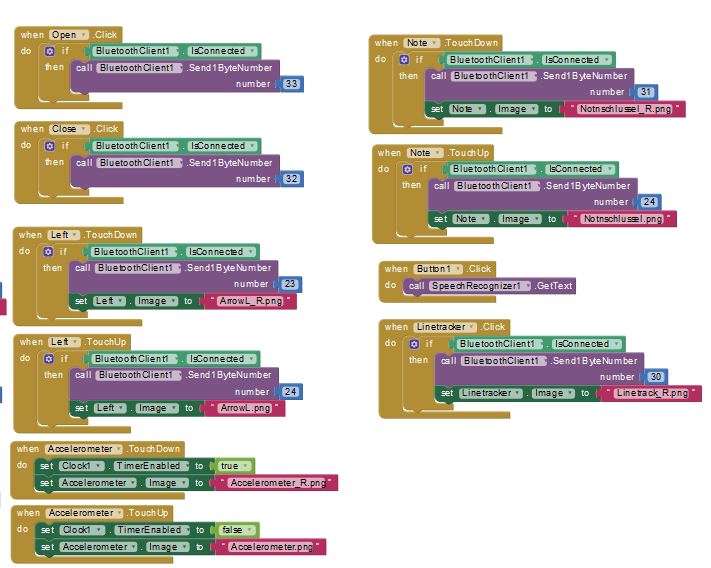
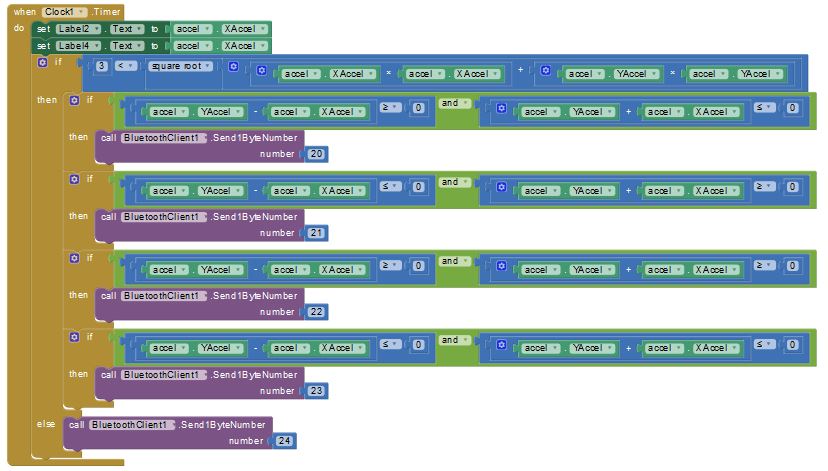
Now there are specific Bluetooth commands, that the Robot can receive over the App (see next chapter). The commands 20 to 24 are used for the movement of RoboLink. He can go Forward, Backwards, Right, Left and Stop. Depending on the different movements, the LED Strip on the back of the robot light up in different colours.


The command 30 is used for the LineTracker.
![]()

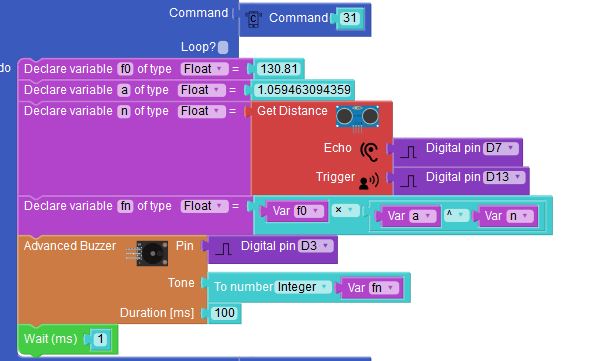
Command 31 lets the robot sing according to the distance the ultrasound sensor measures.
Command 32 and 33 controlls the arms to open and close them.

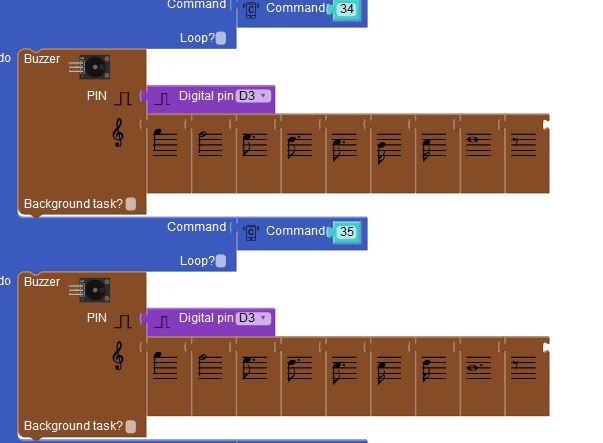
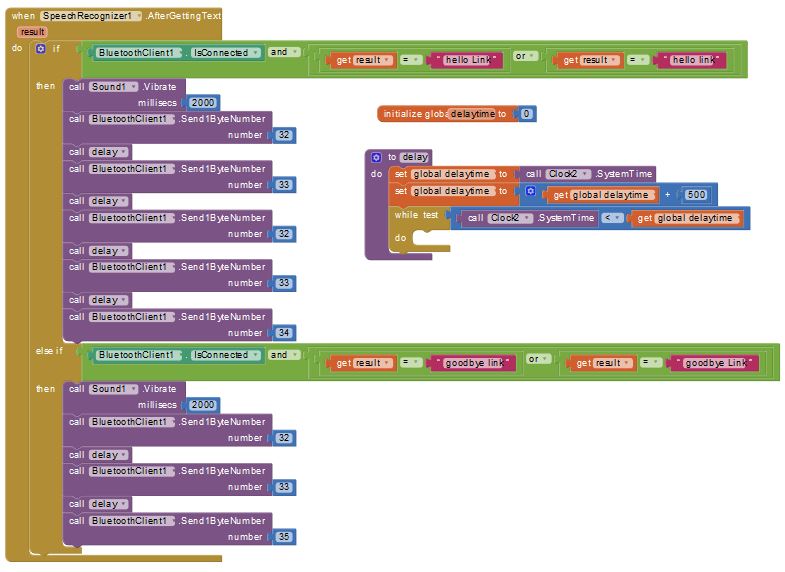
The commands 34 and 35 are used to implement the Hello and Goodbye with arm movement and music snippets playing initialized by the speach control from the App (see next chapter).
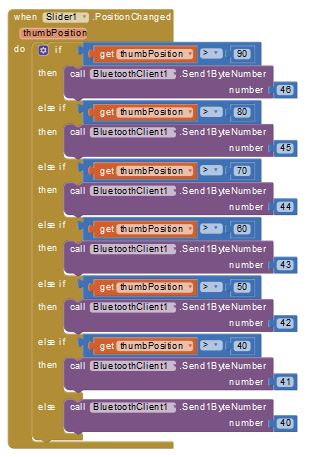
The commands 40 to 46 are reserved to set the value of the speed variable S to a specific number in percentage.

The App
To controll RoboLink I implemented an App with the help of the MIT App Inventor 2. In the following picture you can see the app’s appearance on the phone. It is possible to choose between a variaty of functions on the user panel.


Bluetooth, Accelerometer Indication and Speedbar
At first, the user needs to connect the phone with the robot via Bluetooth, otherwise no functions are available in the app.
When the Bluetooth is connected, the connection symbol changes from![]() to
to ![]() and the other functions are available on the app.
and the other functions are available on the app.
On the top bar you can see the accelerometer in X and Y direction indicating the tilt of the phone. Right to that is the speedbar. Here it is possible to set the speed of the wheel-servos from 40 to 100% in steps of 20%.
Speech Recognition
Below, you can see the code for the speech recognition and the commands used to open and close the arms to indicate waving.
[:]