Learn how to use the ultrasound (sonar) sensor HC-SR04. DYOR robot uses this sensor to detect obstacles and measure distances. Working principle, connection diagrama and programming example with Facilino.
How it works?
The ultrasonic sensor HC-SR04 generates a set of ultrasonic waves using one of the membranes (capsules) and receives the ultrasonid wave with the other membrane (capsule). When a ultrasonic waves impacts on an object rebound on the contrary direction and thus the emitted wave is detected back. The working principle to messure distance is indeed very simple, it uses Time-of-Flight (ToF) which meassures the time elapsed from the wave generation to the wave reception. Actually, the object distance is the half of the wave travelled distance.
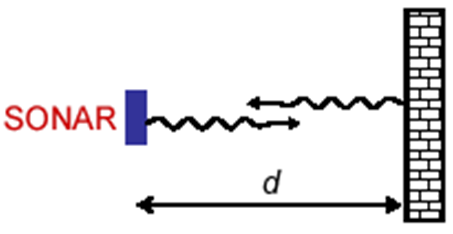
Since the ultrasonic wave velocity, on air, is approximately 343.59m/s, this implies that every 29uS the wave travels 1 centimetre (58uS/cm os the actual value if we consider the time from the emitter to the obstance and the time from the obstacle to the receiver).
The HC-SR04 has (apart from Power (VCC) to +5V and ground (GND) to 0V) two additional pins to control the wave triggering (TRIG) and echo (ECHO). In order to generate a trigger, we must activate the TRIG signal for at least 10uS (set to HIGH or 5V) and then deactivate it (set to LOW or 0V). Then, we must wait to the ECHO signal gets activated. The time between the triggering and the echo signal reception is proportional to the object distance.
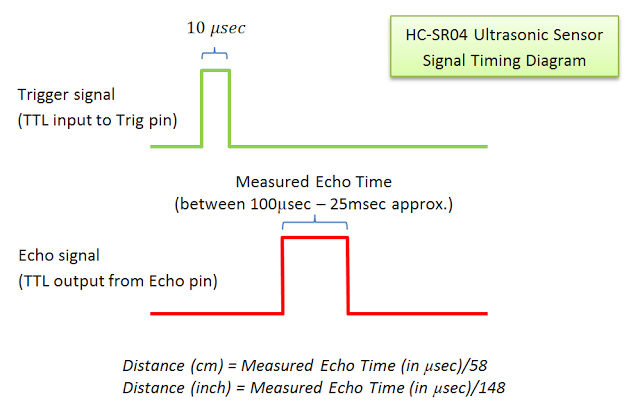
Thus, in order to messure the distance in cm, we must divide the elapsed time in uS by 58.
The ultrasonic sensor is sensitive to different error sources while messuring that should be taken into account. Despite of that, in low-cost robots is a very common sensor, due to its low price, able to provide relatively good distance meassurements in a medium range (from 0cm to 400cm) in the air.
Important properties
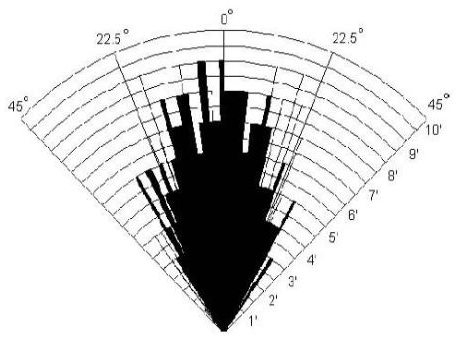
– Angle beam: The ultrasonic wave has an angle beam which is not neglectible and any wave received within the angle beam can be potentially detected. In particular for the HC-SR04 the angle beam is approximately 30 degrees.
– Maximum distance: 400cm. Any object beyond that distance will not be detected.
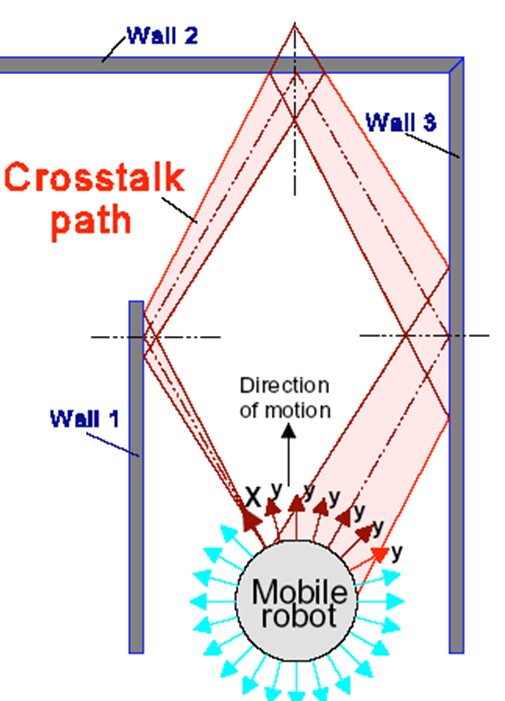
– Cross-talking: This is a phenomenom of wave interferences between different ultrasonic sensors, which is very common in in-door environments with several robots emitting with the same frequency. Actually, this happens not only because of the reception of an ultrasonic wave comming from a different sensor, but also with the sensor itself if it does not wait the appropriate time, for that reason triggering should be done every 50ms or 60ms at most.
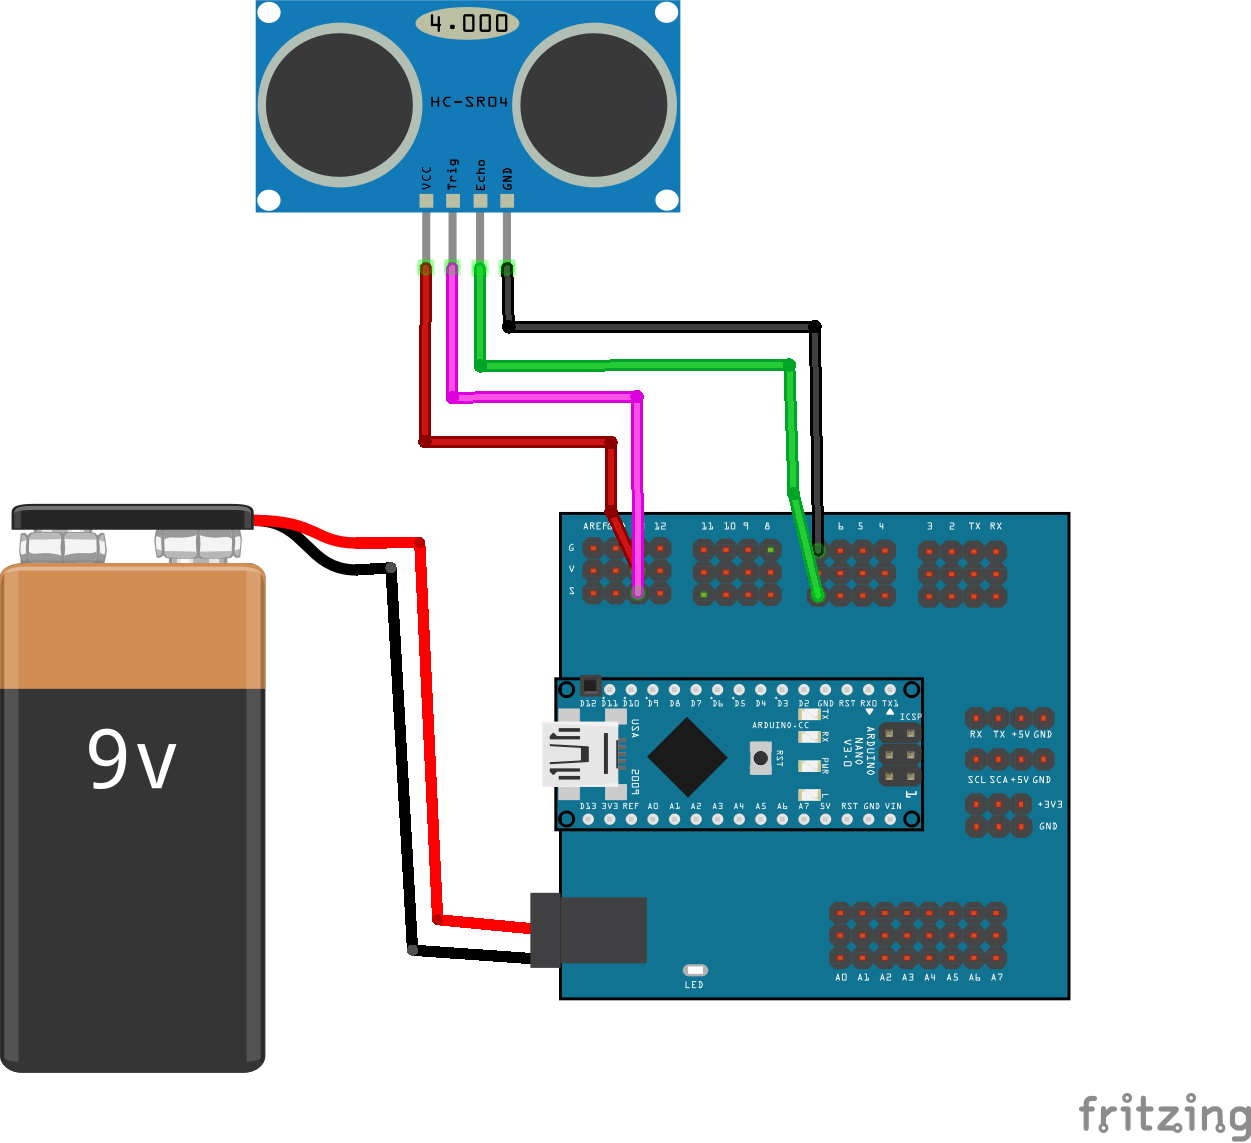
Connection:
In order to use an ultrasonic sensor, we must connect VCC and GND pins to available pins with +5V and 0V and TRIG and ECHO pins to any available digital input/output pinof Arduino. Here we show an example of connection of the ultrasonic sensor where the ECHO pin is connected to pin 7 of Arduino and TRIG is connected to pin 13:
Here you can download the Fritzing file:
Programming
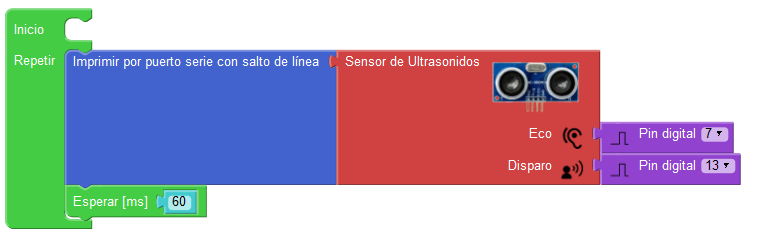
The easiest way to start playing with the ultrasound sensor is by monitoring the measured distance on the USB serial console as follows:
Here you can download the Facilino code:
If we open the serial monitor in Facilino, you should be able to see the following result if we point the sensor to the ceiling and eventually put the hand in front of it:

A very kind robot…
In this example, we are going to use a collision detection instruction with the ultrasonic sensor. This instruction executes a set of instructions in case a collision is detected or a different set of instructions if no collision is detected. In this particular case, we say “Good Morning” when we are close to it (closer than 40cm) and when we are far from it, it says “Goodbye”. This collision detection instruction is combined with a set of instructios to reproduce voice that requires that the buzzer module is connected to pin 3 of Arduino. The connection diagram is as follows:
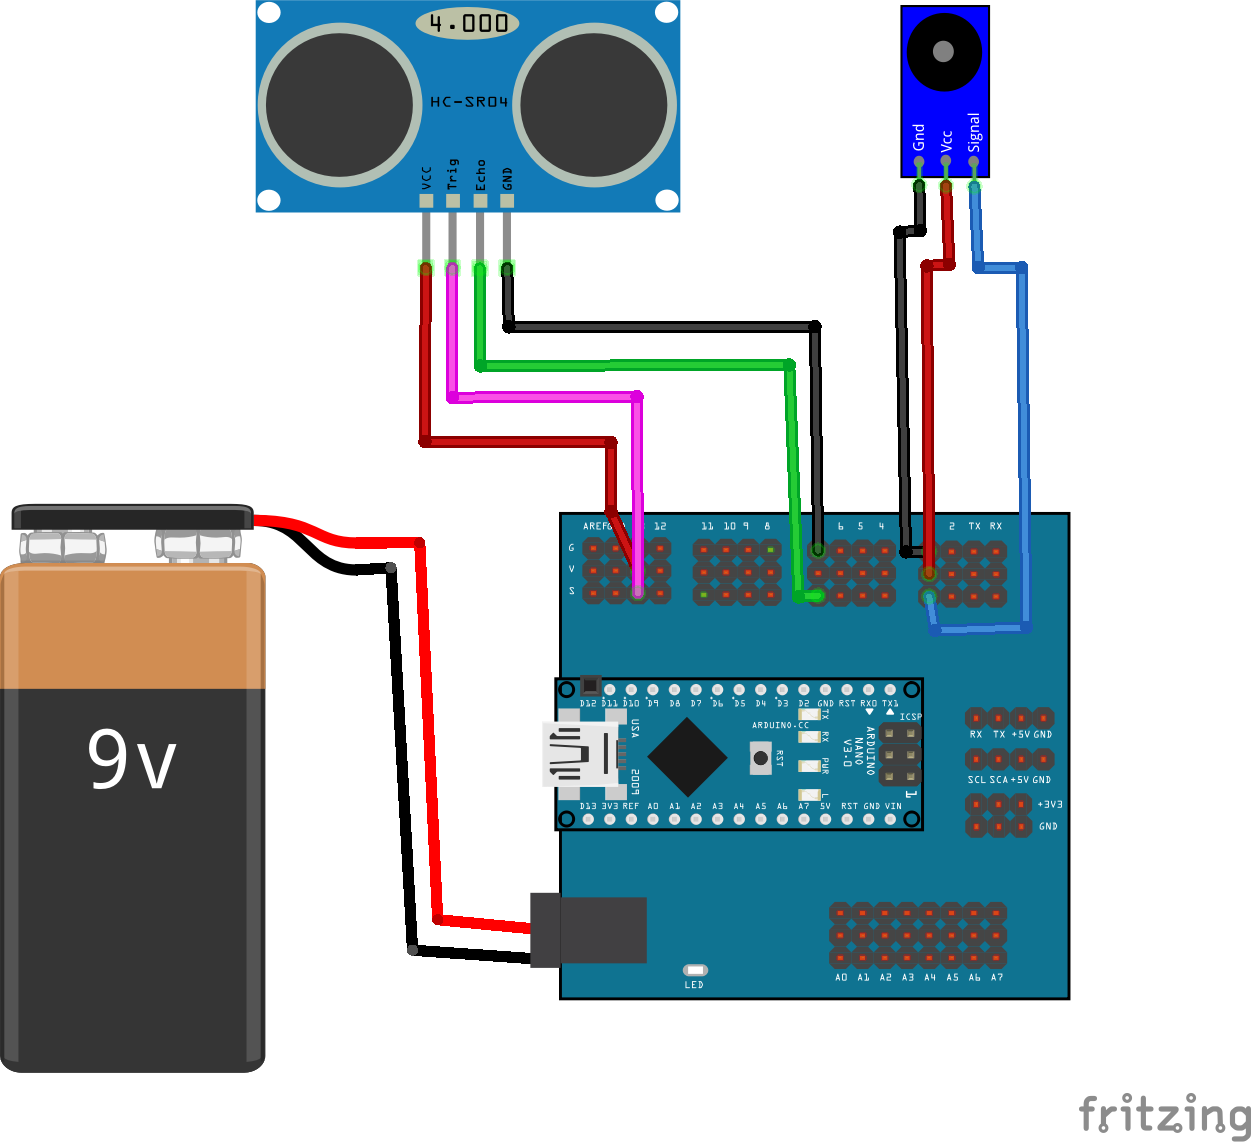
Here you can download the Fritzing connection diagram:
With the following code to test:
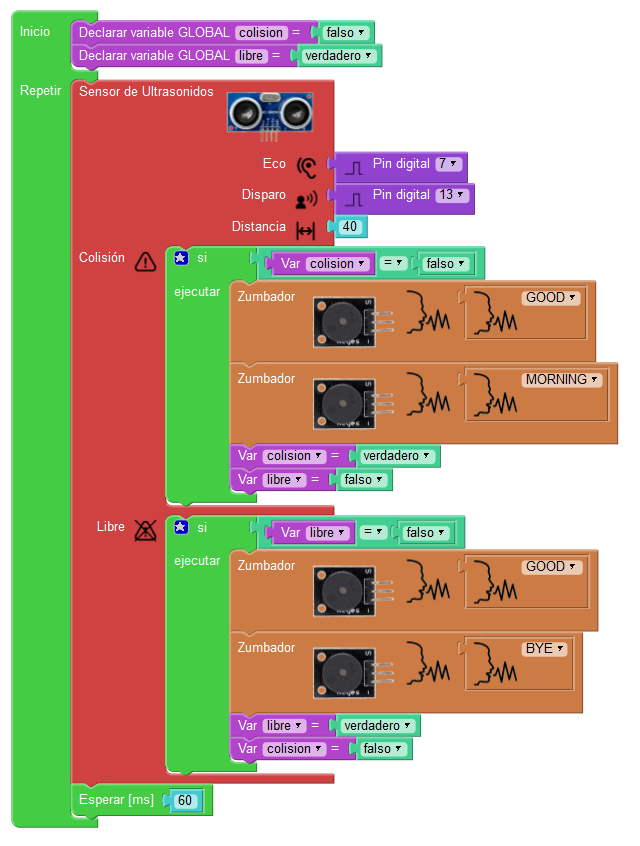
Here’s the actual Facilino code: